
 English


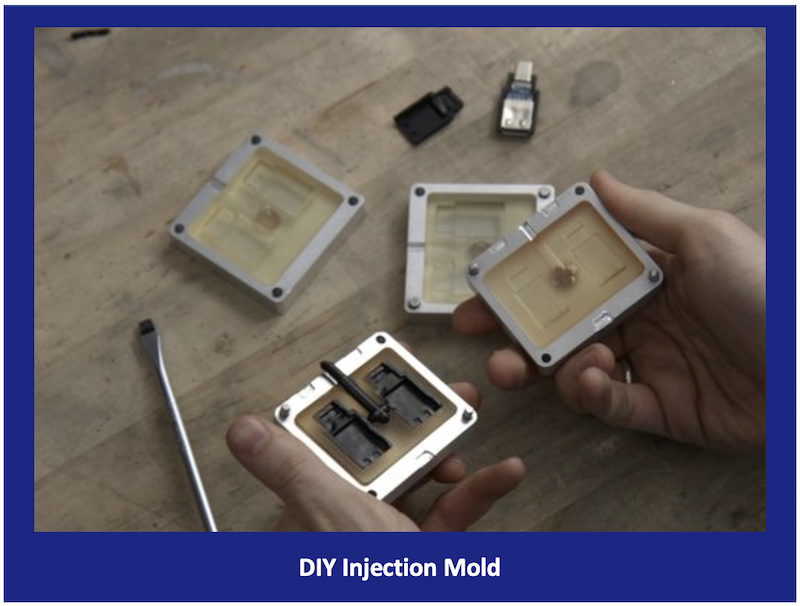
Are you eager to venture into the world of plastic injection molding but concerned about the costs of commercial equipment? Fear not! In this step-by-step tutorial, we'll walk you through the process of building your own DIY plastic injection molding equipment. By following these instructions carefully, you can create a cost-effective setup that enables you to bring your creative ideas to life. Let's dive in!
Before you start building, it's essential to familiarize yourself with the core components of a plastic injection molding system. Research and gather knowledge about the injection unit, mold, heating system, and clamping mechanism. This foundational understanding will guide you throughout the construction process.
To begin constructing your DIY plastic injection molding equipment, you'll need a range of tools and materials. Some of the key items include a sturdy metal frame or workbench, heating elements, temperature controllers, hydraulic or pneumatic cylinders, an injection barrel and nozzle, and a mold cavity. Ensure you have all the required tools and materials at hand before proceeding.
The heating system is crucial for melting the plastic material and maintaining the required temperature. Determine the appropriate heating elements, such as nichrome wires or ceramic heaters, and arrange them around the barrel to provide uniform heat distribution. Install temperature controllers to regulate and monitor the heating process accurately.
The injection unit is responsible for delivering molten plastic into the mold cavity. Construct a sturdy injection barrel using a high-quality metal tube. Attach an injection nozzle to the barrel to control the flow of plastic. The injection unit should be securely mounted to the frame or workbench, ensuring stability during operation.
The clamping mechanism holds the mold in place and applies the necessary force during the injection molding process. Depending on your preference and available resources, you can opt for a hydraulic or pneumatic clamping system. Design and build the clamping mechanism according to your specific requirements, ensuring it provides sufficient pressure and precision.
Constructing a mold requires expertise in design and manufacturing. If you have experience with CAD software and access to machining tools, you can design and fabricate your own mold. Alternatively, you can outsource the mold manufacturing process to a reputable supplier or consider using pre-made molds available in the market. Ensure the mold design suits your desired part specifications.
Once all the components are built, it's time to connect and test your DIY plastic injection molding equipment. Make sure all electrical connections are secure and functional. Test the heating system, injection unit, and clamping mechanism for proper functionality and alignment. Perform a trial run using a test material to verify that the system is operating as expected.
Safety should always be a priority when working with DIY machinery. Implement safety precautions such as wearing protective gear, maintaining a clean workspace, and following proper operating procedures. Regularly inspect and maintain your equipment to ensure optimal performance and minimize the risk of accidents.
DIY plastic injection molding can be a way for your projects, but it isn’t always the right path for every part or every company. DIY efforts may hit a performance, cost, or reliability wall, then outsourcing becomes not just an option but often the smarter choice.
Here are the key situations when outsourcing makes sense:
If your parts require tight tolerances, consistent wall thicknesses, and repeatable cycle-to-cycle quality, DIY is not a best choice, it is suitable for basic prototypes or hobby use, homemade machines often fall short.
Professional injection molding partners have calibrated machines, controlled processing parameters, and quality systems that ensure:
· consistent dimensional accuracy
· minimal part variation
· optimized material performance
If your parts assembly with other components or must perform their application perfectly, precision matters.
It takes lots of time to DIY design, iteration, testing, and debugging. If you just have a tight timeline for the product development, especially in competitive markets, outsourcing is the best choice.
Manufacturing partners can:
· start production while you refine design
· reduce prototype turnaround from weeks to days
· produce multiple tool revisions in parallel
Accelerated timelines help you hit deadlines without compromising quality.
DIY equipment generally has limitations in:
· injection pressure and temperature control
· complex part geometry
· multi-cavity tooling
· high performance thermoplastics
If your parts need features like:
· thin walls
· undercuts
· living hinges
· advanced engineering resins
a professional manufacturing shop can provide the appropriate machines and expertise to mold them properly.
At first glance, DIY tooling and equipment seem cost-effective. But when you factor in:
· material waste
· time investment
· tool rework
· production scrap
outsourcing is amore economical route especially for medium to large quantities. Professional mold makers spread tooling cost across many parts, and their processing efficiency reduces unit cost.
The quality of injection molded parts affects by many factors - Material behavior, gate location, wall thickness strategy, cooling design, and processing parameters all influence success.
An experienced outsourcing partner can provide:
· design for manufacturability (DFM) feedback
· material selection guidance
· tooling suggestions
· process optimization
This expertise helps you avoid common pitfalls that DIY setups are prone to.
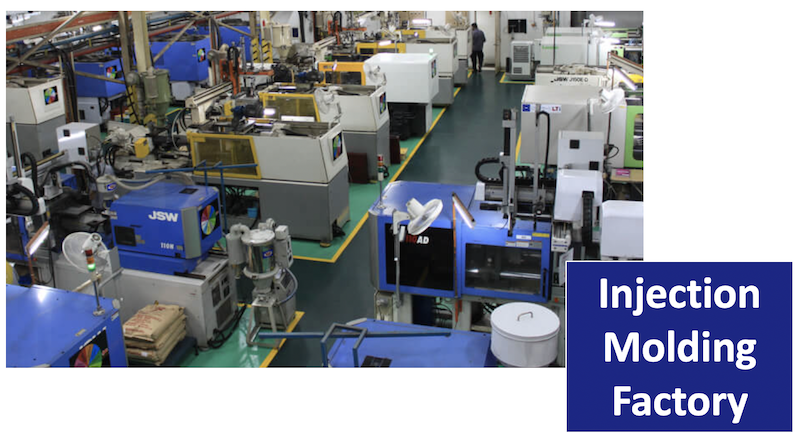
DIY injection machines can handle a handful of parts — but if your project moves into small batch runs or production quantities, it’s often impractical to mold them in-house. Professional facilities are built for scalable production with:
· automation options
· quality inspection
· repeatable output schedules
Outsourcing transitions you from prototype to production with
It is a strategic decision when moving from DIY injection molding to professional manufacturing. The goal is to make good quality parts consistently, efficiently, and ready for real-world use. TEAM MFG helps bridge that gap by offering practical guidance, transparent processes, and production-ready solutions for your projects. A professional injection molding partner can reduce uncertainty and accelerates progress, not matter you are validating a new product, preparing for a pilot run, or scaling toward mass production.
By sharing your drawings, material requirements, and expected quantities, you can receive early feedback that helps:
· identify potential molding risks
· improve part design for manufacturability
· avoid unnecessary tooling revisions
· control cost as volumes increase
Professional outsourcing doesn’t replace innovation — it supports it with proven manufacturing discipline. If your DIY setup has helped you learn and experiment, TEAM MFG can help you turn that learning into stable, repeatable production.
· Website: https://www.team-mfg.com
· Contact Page: https://www.team-mfg.com/contact-us.html
· How to Get Started:
Send us your 2D drawings or 3D files (STEP, IGES, or STL), along with material preferences, quantities, and application details. Our team will review your project and respond with practical manufacturing suggestions.
Building your own DIY plastic injection molding equipment is an exciting and rewarding endeavor. By following this step-by-step tutorial, you've acquired the knowledge and guidance necessary to construct your custom setup. Remember to exercise caution, adhere to safety protocols, and continuously refine your equipment as you gain experience. With your own DIY plastic injection molding equipment, you're well on your way to transforming your ideas into tangible plastic creations. If DIY is not the best choice for the current project, just try outsources. Start building and unleash your creativity now!
Not quite suitable, DIY injection molding is usually used for learning, experimentation, and very simple prototype parts. However, if for products that require dimensional accuracy, material consistency, or functional reliability, DIY setups often struggle to deliver stable results. Professional molding is typically required for market-ready parts.
Common limitations include inconsistent injection pressure, uneven heating, limited material options, poor surface finish, and difficulty controlling tolerances. These issues become more noticeable as part complexity or quantity increases.
No. Outsourcing is commonly used for prototypes, bridge production, pilot runs, and small-to-medium volumes. Many manufacturers offer flexible tooling solutions that support gradual scaling without committing to mass production upfront.


